Do It Right! Lessons from the field not to be repeated
Deck planing
Look at the smoke coming from the world's
first wood-fired deck grinder!
Heavy broom finish
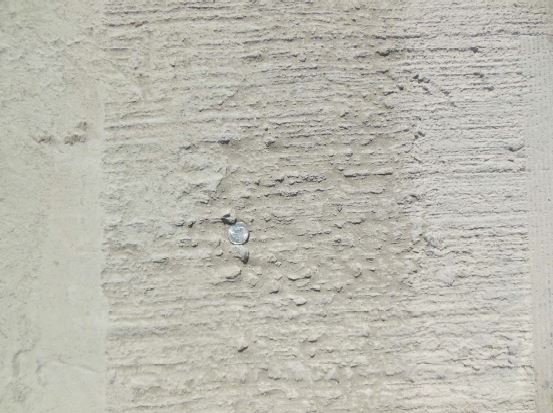
That’s a quarter nestled between a couple of rocks
on the planed surface of a deck! The Contractor
figured they didn’t have to worry about finishing
the surface, since the deck was being planed!
Notice the area where the plane touched the deck
on the right side of the photo, and the smooth
gutter on the left side.
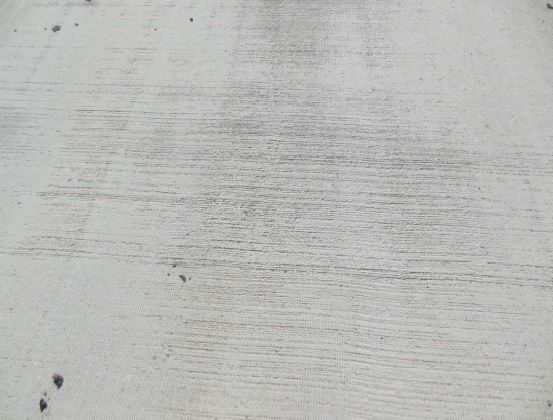
This deck has been planed already, and
those striations run perpendicular to the
heavy broom marks that are so much more
prominent.
When we have a deck planed, we want to have the entire driving surface planed!
Make sure to pull a string across the expansion joint when doing the dry run, and
then again during the pour—after the 10’ bull
float had been used to check it.
Check to see
how it will ride when the back of the
approach is formed, and when it is poured.
Due to extremely heavy brooming, combined with a final
surface that does not meet the 1/8”-in-10-foot surface
tolerance, we end up with large areas that fail to get
treated by the texture planer.
This will lead to more tire noise than we want, and an increased possibility of
localized ponding and chlorides soaking into the deck.
We may tell the Contractor to seal this entire deck to
limit chloride intrusion in the monolithic slab.